
Setting Up API Connection with Cloze CRM
Connect My Plus Leads directly to your Cloze account and have your leads delivered to your CRM automatically. This tutorial walks you through the setup, which takes only a few minutes and removes the need for manual CSV exports and imports.
About Cloze
Cloze is an AI-powered CRM built for real estate agents, teams, and brokerages. Instead of relying on manual data entry, Cloze pulls your communication history together and tells you who to follow up with. Key features include:
- Automatic activity tracking: Emails, phone calls, texts, meetings, and notes are logged to each contact for you.
- Follow-up reminders: Daily prompts show who you should reach out to so no relationship goes cold.
- AI assistance: Built-in AI helps draft emails and surfaces opportunities in your sphere of influence.
- Lead management and marketing: Capture, route, and nurture leads, and run personalized email campaigns.
- Mobile access: Work your contacts and tasks from your phone.
What the Integration Does
Automated Lead Transfer
Send FSBO, FRBO, Expired, and Preforeclosure leads from My Plus Leads to Cloze automatically.
People, Properties, and Notes
My Plus Leads adds the lead as a person and property in Cloze, along with related notes and activity.
Real-Time Updates
Keep your CRM continuously updated with the latest lead information.
Time-Saving Solution
Eliminate manual export/import work and focus on calling leads and closing deals.
Setting Up the API Connection
Follow these steps to connect My Plus Leads to Cloze. You will need your My Plus Leads login and your Cloze login.
Visit https://portal.myplusleads.com and log in with your credentials.

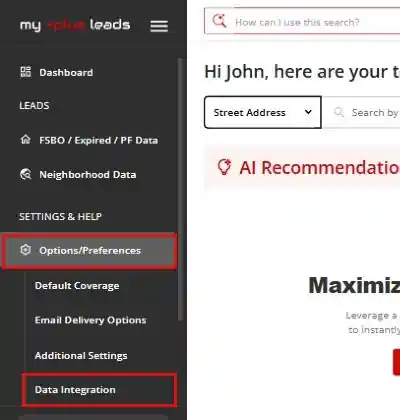
In the left-hand menu, find the SETTINGS & HELP section.
Click Options/Preferences to expand it.
Click Data Integration in the list that appears.
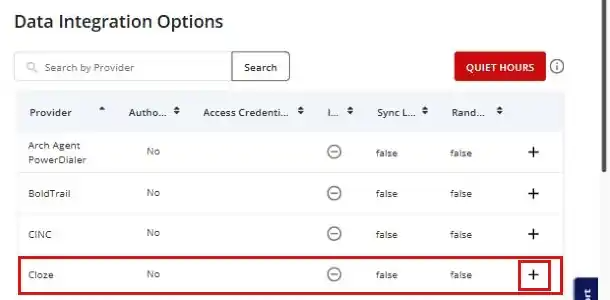
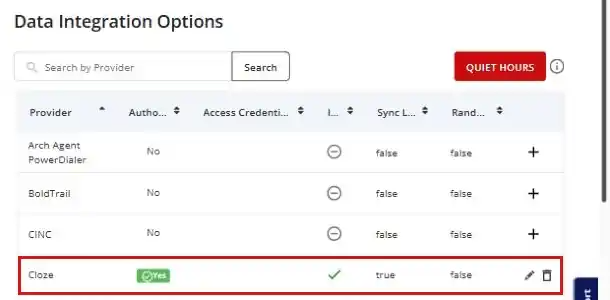
On the Data Integration Options page, scroll through the list of providers or use the Search by Provider box to find Cloze.
Click the + sign at the end of the Cloze row.
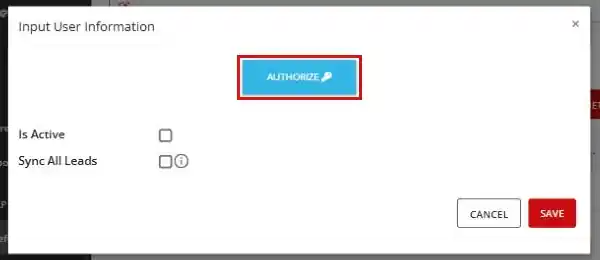
In the window that opens, click the blue AUTHORIZE button. Leave the checkboxes alone for now; you will set them after the connection is approved.
Cloze opens in a new browser tab. If nothing happens, your browser may have blocked the pop-up. Allow pop-ups for portal.myplusleads.com and click AUTHORIZE again.
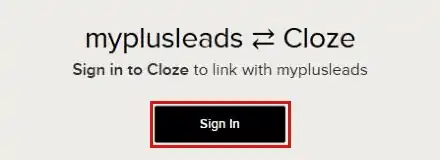
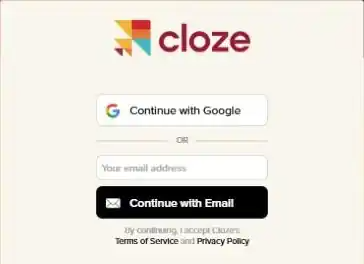
On the Cloze page, click Sign In.
Sign in the same way you normally sign in to Cloze: choose Continue with Google, or enter your email address and click Continue with Email.
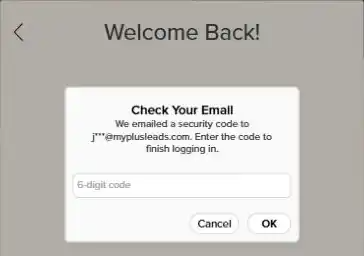
If you sign in with email, Cloze may email you a 6-digit security code. Enter the code and click OK.
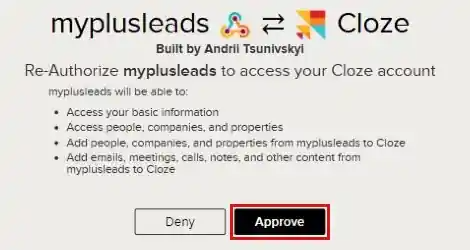
Cloze then shows what My Plus Leads will be able to do in your account. Check that the account shown at the bottom of the page is the Cloze account you want to connect, then click Approve.
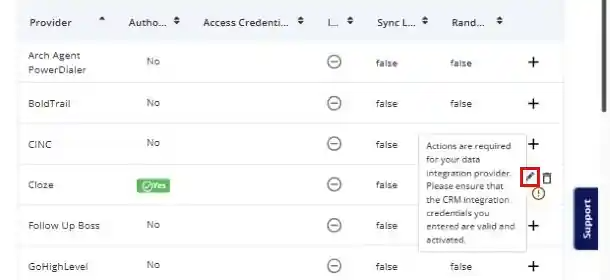
After you approve, you are returned to the Data Integration Options page. Cloze now shows a green Yes in the Authorization column.
You will also see a warning icon on the Cloze row. This is expected: the connection is authorized but not yet active.
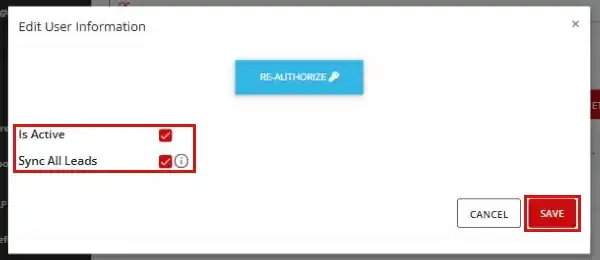
Click the pencil icon on the Cloze row to open its settings.
Configure the two options, then click SAVE:
- Is Active: Check this box to turn the integration on.
- Sync All Leads:
- Checked: All leads are passed to Cloze automatically. Most users choose this option.
- Unchecked: Leads are not sent automatically. You send leads to Cloze manually, typically after calling and qualifying them.
Syncing Historical Data to Cloze
"Sync All Leads" sends new leads from the moment the integration is active. It does not send leads you received before that. To send earlier leads to Cloze, create a historical search and sync the results.
For detailed instructions, see: How to Sync Backdata Through Data Integration
Verifying the Connection
To make sure your integration is working:
- On the Data Integration Options page, confirm the Cloze row shows Yes under Authorization and a green check mark under Is Active.
- When a new lead arrives in My Plus Leads (or after you send one manually), confirm it appears in your Cloze account.
- Open any listing in the Detail view and check Data Integration History to see what was sent to Cloze and when.
Managing Your Integration
Return to Options/Preferences > Data Integration at any time and click the pencil icon on the Cloze row to:
- Pause the integration by unchecking "Is Active"
- Turn "Sync All Leads" on or off
- Refresh the connection by clicking RE-AUTHORIZE
To remove the integration entirely, click the trash can icon on the Cloze row.
Troubleshooting
- Nothing happens when you click AUTHORIZE: Your browser blocked the pop-up. Allow pop-ups for portal.myplusleads.com and try again.
- Warning icon on the Cloze row: The integration is authorized but not active, or the authorization is no longer valid. Click the pencil icon, check "Is Active," and save. If the warning remains, click RE-AUTHORIZE.
- Leads stopped arriving after working for a long time: Cloze access expires after 1 year. Click the pencil icon and then RE-AUTHORIZE.
- Leads are going to the wrong Cloze account: You approved the connection while signed in to a different Cloze account. Sign out of Cloze, then RE-AUTHORIZE with the correct account.
- Leads are not arriving automatically: Confirm both "Is Active" and "Sync All Leads" are checked.
- Contact My Plus Leads support if problems persist.
Conclusion
With My Plus Leads connected to Cloze, your leads arrive in your CRM without any manual work, so you can spend your time building relationships and closing deals.
Check our Knowledge Base for more resources and best practices for getting the most out of your integration.